
- A+
一、相关历史
smokeping 发布于2001年, 是Tobi Oetiker的又一作品,他也就是大名鼎鼎的时序式绘图数据库引擎rrdtool的作者。 smokeping由Perl语言写成,底层依赖于rrdtool和fping。
注1:rrdtool 1.0版由作者发布于1999年,rrdtool的出现是为了取代自己先前创造的另一著名工具 MRTG。
注2:fping初版由Roland Schemers 发布于1992年,在2011年以前没有官方版本。目前版本维护者为 David Schweikert,自3.0版本之后,好事者Tobi Oetiker 为适应smokeping,对fping做了定制性修改。
二、组成部分
smokeping整个系统正常运行需要:web服务器软件、smokeping主服务、探针,rrdtool。
1. web服务器软件
smokeping拥有直观⾼效且漂亮的webUI,因此需要借助第三方web服务,默认使用的是apache服务,同时需要启用cgi模块。
2. smokeping主服务
smokeping主服务即smokeping工作进程,负责在后台(也可以前台)执行监测任务。
3.探针
smokeping实际使用的监测工具即探针。默认探针是fping,常用探针例如:
- fping 默认探针,使⽤icmp协议,可并发检测⽬标RTT(Round-Trip Time)数值
- echoping echo服务检测,使⽤tcp/udp协议,默认端口号7
- tcpping tcp端口检测,使用tcp协议监测端口连通性和时延
更多关于探针的介绍可以参阅 作者网站。
4. rrdtool
rrdtool(Round Robin Database Tool)即轮询调度数据库⼯具,使用C语言写成,是一种强大的绘图引擎,兼有时序数据库和绘图两种功能。rrdtool被许多监控平台所使用,如smokeping、cacti、open-falcon等。
三、简单部署
1. 安装
安装smokeping,是最简单的一部分,甚至在ubuntu 18.04 上,只需要一条命令:
sudo apt install -y smokeping
期间只会遇到两次交互式对话界面,Postfix 配置和libssl的配置:
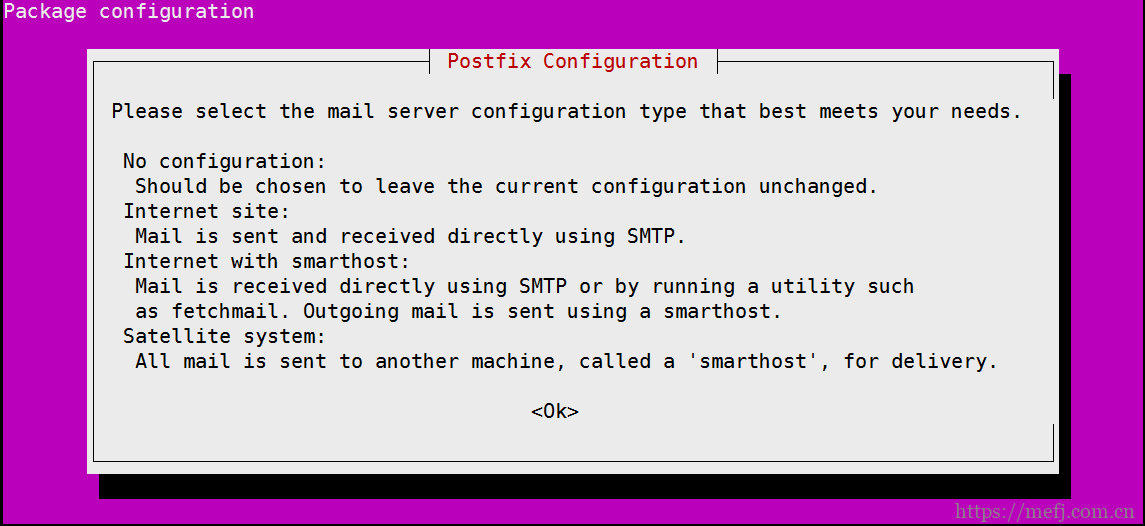
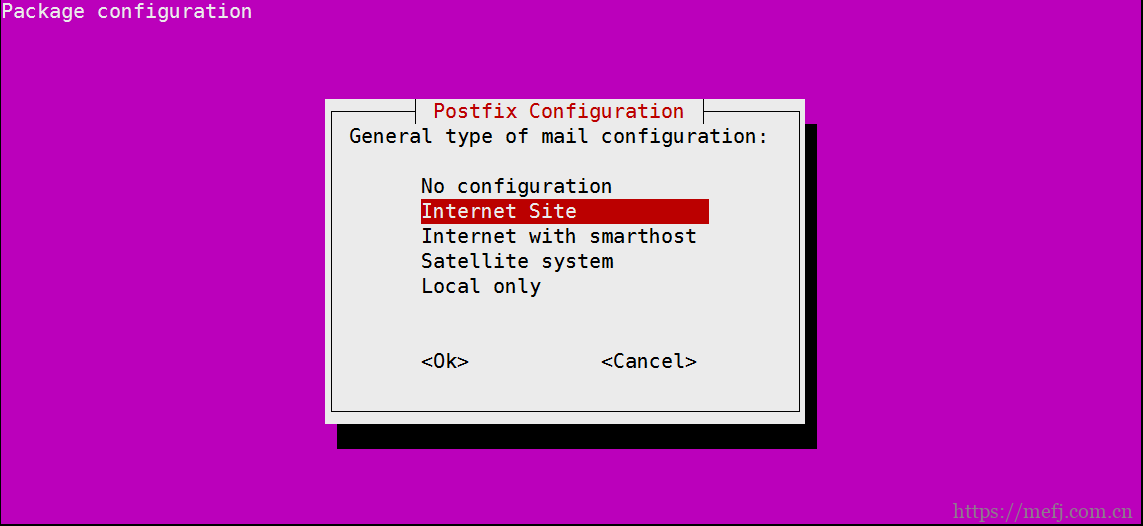
我们将postfix仅作为smokeping依赖的⻆色安装,因此只需要选择local only
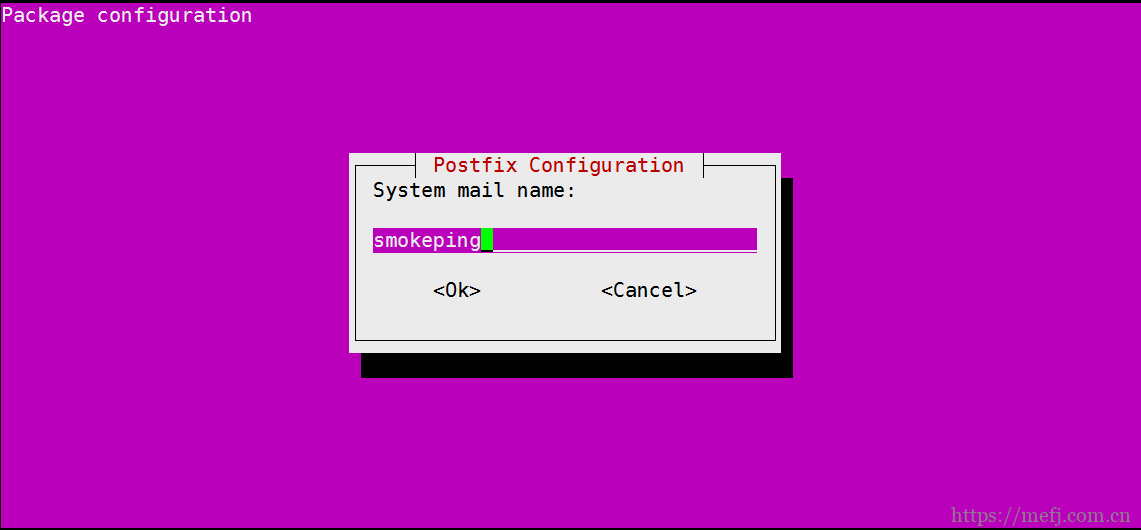
系统邮件域名可以随意设定,选择OK安装
我们希望在更新libssl等软件包时,可以不再询问,自动重启相关服务,因此选择Yes apt会自动解决所有依赖,并且smokeping会自带apache的配置文件路径在(/etc/apache2/conf- available/smokeping.conf)
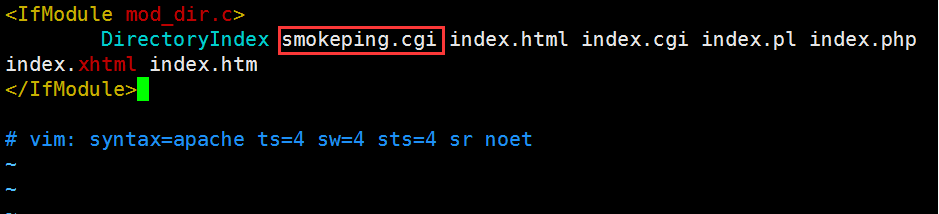
安装结束后,可以直接在浏览器通过http://IP地址/smokeping/smokeping.cgi 访问, 之所以url定位到smokeping.cgi,原因在于smokeping.cgi缺省配置下不属于默认index类型,可以 在/etc/apache2/mods-available/dir.conf 文件内进行添加:
保存完毕之后,重启apace2 服务:
sudo systemctl restart apache2
为了保证smokeping正常工作,我们通常要将smokeping和apache2 开机自启,防火墙放行服务端口:
sudo systemctl enable smokeping
sudo systemctl enable apache2
sudo ufw allow 80
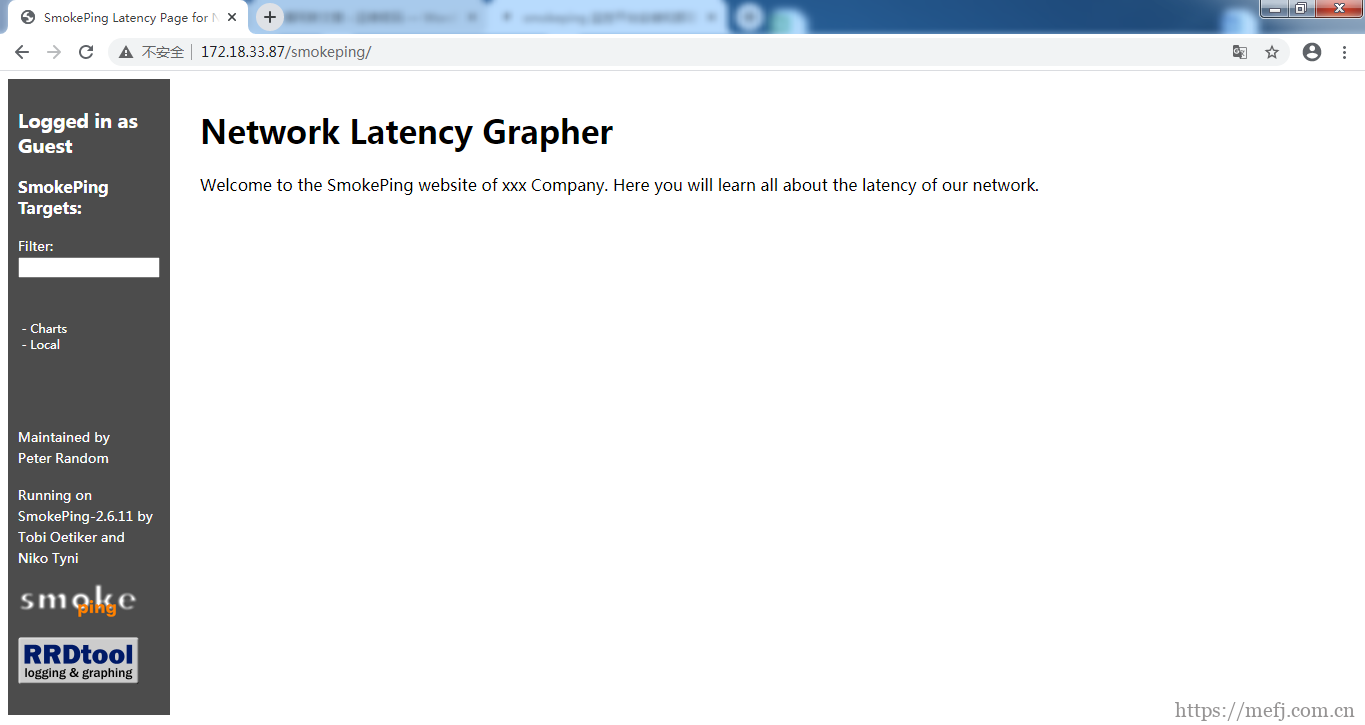
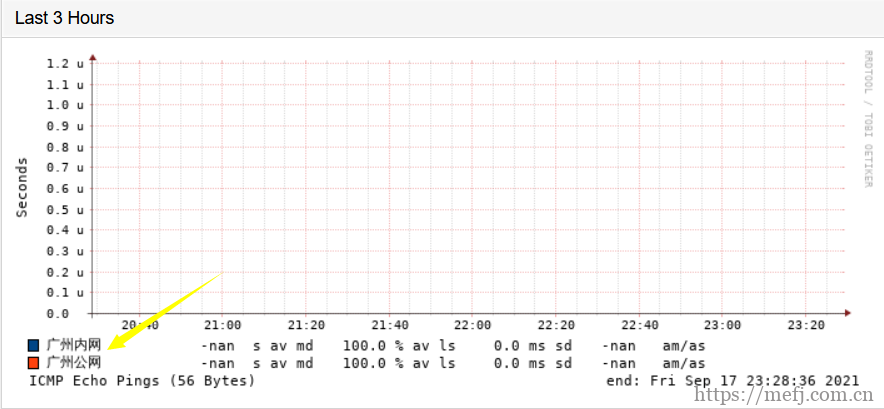
现在,在浏览器器通过 http://IP地址/smokeping/ 即可打开smokeping web界面。如图:
2.配置文件介绍
smokeping 的配置文件默认存放在/etc/smokeping/ 目录下,配置文件采用David Schweikert(没错,就是fping的开发者)开发的Config::Grammar解析器,基本语法为:
- '#' 表示行注释
- '' 在行尾表示行连接符,但是会在两个连接的行之间插一个空格,在非行尾表示转义字符
- '@include' 用于包含另一个配置文件,如 @include /etc/smokeping/config.d/pathnames
- '@define' 用于定义文本宏,如 @define M_HOST 10.10.10.10
- 在配置表的区域中如果有空格可以用 " 或 ' 引起来,也可以使用转义字符 ,在引号内的引号必须使用转义字符 +、++、+++ 分别表一级、二级、三级子配置项
主配置文件为 /etc/smokeping/config,我们观察打开config文件会发现其实smokeping的配置文件远比我们想象的要结构化:
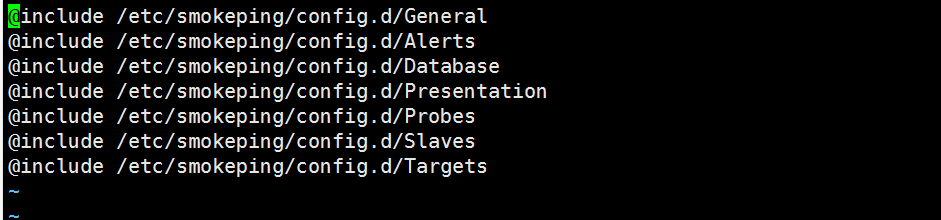
该配置文件中用@include语句引用了其他具有特殊分工的配置文件。
(1). General
/etc/smokeping/config.d/General 包含基础信息的配置
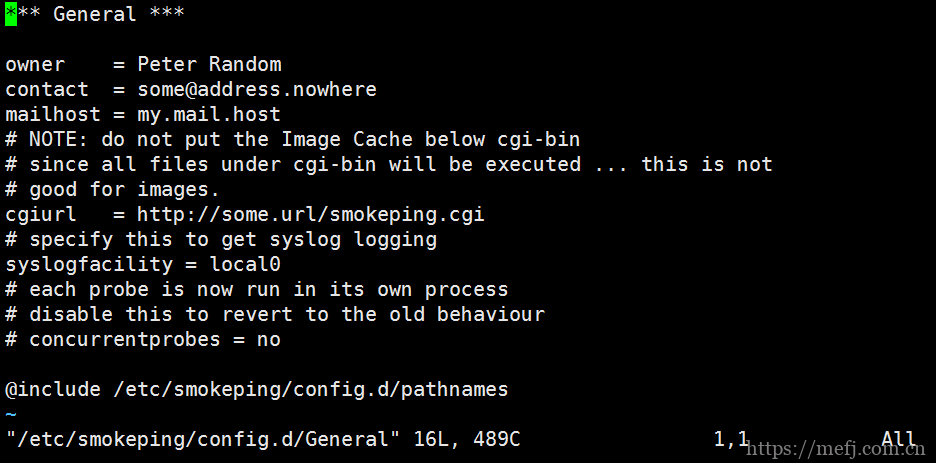
可以更改所有者(owner)、联系方式(contact)、邮件服务器(mailhost)、主站cgi地址(cgiurl,此选项对主从架构很重 要)、syslog消息类型(syslogfacility)。同时,通过@include字段引用了同目录下的pathnames。
注意:smokeping配置文件中的*** xxx *** 是有代表意义的不要随便去掉上面的general是smokeping和sendmail联动的配置。
(2). pathnames
/etc/smokeping/config.d/pathnames 定义了系统变量的路径
sendmail = /usr/sbin/sendmail
imgcache = /var/cache/smokeping/images
imgurl = ../smokeping/images
datadir = /var/lib/smokeping
piddir = /var/run/smokeping
smokemail = /etc/smokeping/smokemail
tmail = /etc/smokeping/tmail
dyndir = /var/lib/smokeping/__cgi
默认可以不去动,除非自己更改了相关目录。
(3). Alerts
/etc/smokeping/config.d/Alerts 定义了报警规则
*** Alerts ***
to = alertee@address.somewhere
from = smokealert@company.xy

+someloss
type = loss
# in percent
pattern = >0%,<em>12</em>,>0%,<em>12</em>,>0%
comment = loss 3 times in a row
默认条件下,采用sendmail邮件报警的方式,to 即接收方,from 即发送方。需要注意的是默认情况smokeping采用自带报警,但是to后面也可以加“|”管道符来调用外部程序来自定义报警。someloss是预定义的一个默认检测器(其实也就是触发报警的规则),检测器不仅仅是一个阈值,它可以定义一组RTT从旧到新的变化过程,pattern 的值以一个运算符开始,按照从旧到新的状态变化,示例中,>0% 表示有丢包,*12* 表示在该组中最大忽略匹配12个数值,因此这段定义的意义是:匹配一组数据是否满足丢包次数大于等于3次。
old-------------->new
>0%,*12*,>0%,*12*,>0%
它还支持更多的其他的匹配,比如:
old ------------------------------> new
<10,<10,<10,<10,<10,>10,>100,>100,>100
以上表示匹配一组数据,RTT(延迟)从低于10ms突然增加到超过100ms。
old ------------------------------> new
==0%,==0%,==0%,==0%,>20%,>20%,>20%
以上表示匹配一组数据,从不丢包到连续三次采集数据丢包超过20%。
old------------>new
==0%,==0%,==0%, ==U
以上表示匹配一组数据,目标突然不可达。
更多检测器请参阅作者关于配置的介绍
(4). Database
/etc/smokeping/config.d/Database 描述rrd数据库的属性。
*** Database ***
step = 300
pings = 20
# consfn mrhb steps total
AVERAGE 0.5    1   1008
AVERAGE  0.5  12   4320
   MIN  0.5  12   4320
   MAX 0.5   12    4320
AVERAGE 0.5  144  720
   MAX  0.5   144   720
   MIN   0.5  144   720
需要注意的是,更改数据库配置文件无法对现有的rrd起作用,更改数据库配置文件后,需要清理现有的rrd缓存以使程序正常工作,否则web端会显示报错。
默认rrd目录为:/var/lib/smokeping/。
step 表示基本操作间隔,即smokeping探测目标主机的间隔,默认300 秒,pings表示在一次探测动作中,发出探测包的数量,step 和 pings 的值均可以被后续的探针设置所覆盖。此配置也包含数据库归档合并的规则,共4列:合并方法、允许未知数值比例、步进,存储总行数。每一行表示一条RRA(循环归档) 存储规则,预定义了多条AVERAGE、MIN,MAX规则。以AVERAGE为例,第一条AVERAGE,步进1,行数1008,按 照缺省step=300的条件下,表示5分钟一条,最大1008条,共存储3.5天数据,这是以此精度绘图的最大时间范围,如果超出范围,将会继续匹配合适的RRA,比如第二条AVERAGE,存储的时间范围是180天,但是精度是1小时。
(5) Presentation
/etc/smokeping/config.d/Presentation 用于定义smokeping的显示规则。
*** Presentation ***
template = /etc/smokeping/basepage.html
charset = utf-8
template 即webUI使用的网页模板,默认指向/etc/smokeping/basepage.html,模板中包含各种表单关键字。charset 即文档编码,默认使用UTF-8。
charts menu = Charts
title = The most interesting destinations

++ stddev
sorter = StdDev(entries=>4)
title = Top Standard Deviation
menu = Std Deviation
format = Standard Deviation %f

++ max
sorter = Max(entries=>5)
title = Top Max Roundtrip Time
menu = by Max
format = Max Roundtrip Time %f seconds

++ loss
sorter = Loss(entries=>5)
title = Top Packet Loss
menu = Loss
format = Packets Lost %f
smokeping支持报表功能,允许以特定的标准对图形目标排序显示。menu 表示菜单名称,title表示显目标题。在子配置项中,可以看到sorter选项,通过此选项可以制定排序器,针对RTT的统计,内置了:标准差StdDev(arg1=>val1,arg2=>val2 ),最大 Max( arg1=>val1,arg2=>val2 ),丢包率 Loss( arg1=>val1,arg2=>val2 )等排序方法。format选项表示图例输出格式,此格式参考fprint字符串格式。
+ overview
width = 600
height = 50
range = 10h
overview 部分,定义了概述图的外观,宽 width,高height, 时间跨度 range,range的格式可以是s(seconds), m(minutes), h(hours), d(days), w(weeks), y(years)。
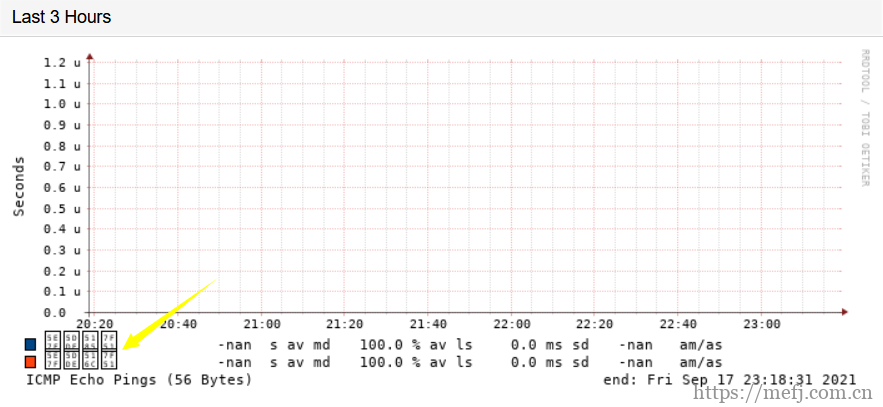
+ detail
width = 600
height = 200
unison_tolerance = 2
"Last 3 Hours" 3h
"Last 48 Hours" 48h
"Last 10 Days" 10d
"Last 360 Days" 360d

#+ hierarchies
#++ owner
#title = Host Owner
#++ location
#title = Location
detail部分定义了详细图的外观,宽 width,高height,unison_tolerance 规定了统一缩放的因子,此值必须参照每轮探测RTT结果的max中间值即median max,实际是为了保证图形缩放时的可读性,默认值为2,表示任何最大值小于中间值“max”一半或两倍以上的图都将从统一缩放中删除。 detail 也包含可定义图形时间尺度的部分,包含两列:图形时间尺度的描述和时间跨度值,此值的格式与overview部分的range格式⼀致。
(6) Probes
/etc/smokeping/config.d/Probes 用于配置smokeping的探针模块,smokeping支持很多探针模块,最常用的就是内联的 fping。
*** Probes ***
+ FPing binary = /usr/bin/fping
探针的定义采用层级结构,需要注意一级探针的名称是內建而不可更改的,可以在一级探针内部定义二级探针,比如:
*** Probes ***
+ FPing
binary = /usr/bin/fping

++ FPing2
sourceaddress = 10.10.10.39
packetsize = 64

++ FPing3
sourceaddress = 192.168.0.39
step = 60
binary 为探针的路径,sourceaddress为探针使用的源IP地址,这个对于多出口的环境有意义,packetsize 为探测包的尺寸,默认为56字节,step 为步进值,如果在General域中,concurrentprobes值被设为yes(默认就是这样),那么,此step 的值会覆盖从Database域继承下来的step值。子探针会继承上级探针的设置参数,同时也可以再次配置以覆盖继承下来 的参数。
(7) Slaves
/etc/smokeping/config.d/Slaves 用于定义使用到的smokeping从节点
*** Slaves ***
secrets=/etc/smokeping/smokeping_secrets

+slave1
display_name=beijing
color=66ccff

+slave2
display_name=shanghai
color=66ffcc
在使用主从结构时,需要一个验证文件,即secrets指定的值,默认为 /etc/smokeping/smokeping_secrets,对于每一个 从节点,还需要指定显示名称 display_name,显示颜色 color(此颜色指的是概述图上的线色,非细节图),颜色代码采用RRGGBB形式。
(8) Targets
/etc/smokeping/config.d/Targets 用于定义监控目标各项参数,主机依然采用层级结构。
*** Targets ***
probe = FPing

menu = Top
title = Network Latency Grapher
remark = Welcome to the SmokePing website of XXX team.  Here you will learn all about the latency of our network.

+ Local
menu = Local
title = Local Network
#parents = owner:/Test/James location:/

+ LocalMachine
menu = Local Machine
title = This host
host = localhost
#alerts = someloss

++ TEST1
menu = Test server
title = Test Network
host = 10.10.10.254
alerts = someloss
probe = FPing1
slaves = slave1 slave2
Target是搭建snokeping主要配置的部分。menu定义了条目的菜单名称,title定义了条目的标题名称,host 定义了目标 主机名,alerts定义了使用的报警器,probe定义了使用的探针,slaves定义了需要使用的从服务器列表。同样,子条目 的参数会继承父条目,也可以进行覆盖。
(9) basepage
/etc/smokeping/basepage.html 是webUI的模板页面。
<?xml version="1.0" encoding="iso-8859-15"?>
<!DOCTYPE html PUBLIC "-//W3C//DTD XHTML 1.0 Strict//EN" "http://www.w3.org/TR/xhtml1/DTD/xhtml1-strict.dtd">
<html xmlns="http://www.w3.org/1999/xhtml">
<HTML>
<HEAD>
<META HTTP-EQUIV="Cache-Control" content="no-cache">
<META HTTP-EQUIV="Pragma" CONTENT="no-cache">
<META HTTP-EQUIV="Refresh" CONTENT="<##step##>">
<TITLE>SmokePing Latency Page for <##title##></TITLE>
<STYLE type="text/css">
<!--

.menubar,
.menubar a
{
    color: white;
    text-decoration: none;
}

.menubar {
    background: #4c4c4c;
}

.menu,
.menuitem,
.menuopen,
.menuactive
 {      font-size: 10px;
        font-family: sans-serif;
       }

       }

a.menulink {

a.menulinkactive {
        color: #1280d7;
        }


a.menulinkactive:hover {
        color: #000000;
}

a.menulink:hover       {
        color: #e0e0ff;
        }

-->
</STYLE>

<script src="/smokeping/prototype/prototype.js" type="text/javascript"></script>
<script src="/smokeping/cropper/cropper.js" type="text/javascript"></script>
<script src="/smokeping/smokeping-zoom.js" type="text/javascript"></script>


</HEAD>
<BODY bgcolor="white">
<TABLE border="0" cellpadding="10" cellspacing="0">
<TR>
  <TD class="menubar" align="left" width="130" valign="top">
  <P></P>
  <P><h3>Logged in as <##authuser##></h3></P>
  <P><B>SmokePing Targets:</B>  </P>
  <P><##menu##></P>
  <br/>
  </td>
   <TD rowspan="2"></TD>
   <TD rowspan="2" valign="top">
      <H1><##title##></H1>
        <P><##remark##></P>
        <P><##overview##></P>
        <P><##body##></P>
   </TD>
</TR>
<tr>
<td class="menubar" valign="bottom" width="130">
  <p><small>Maintained by <br/><A href="mailto:<##contact##>"><##owner##></A></small></p>
  <p><small>Running on <##smokeping##> by <##author##></small></p>
  <P><##smokelogo##></P>
  <P></P>
  <P><##rrdlogo##></P>
</TD>
</tr>
</TABLE>
</BODY>
</HTML>
在之前的Presentation 配置中提到过,smokeping的web显示界面有一个基础模板页面,此文件纯粹是一个html文档,修改此文件可以对页面默认的颜色以及其他样式做定制,html及css不在本文的讨论范围。
(10) smokeping_secrets
/etc/smokeping/smokeping_secrets 用于设定主从验证
slave1:ZmxvYXRpbmdjYXQK
slave2:ZmxvYXRpbmdjYXQK
boomer:lkasdf93uhhfdfddf
我们先前在Slave配置文件中提及过,smokeping主从架构需要配置验证,所以主服务器和从服务器均要配置此文件,此文件的标准权限为600,此文件的所有者必须为smokeping的执行者(在Ubuntu中默认为用户 smokeping)。需要注意的是,此文件的内容在主从服务器上是不同的,以上示例为主服务器上的内容,拥有两个域:从机名称,密码。并以":" 为域分隔符。如果是从服务器,此文件内容只需要写一行密码即可,如slave1的/etc/smokeping/smokeping_secrets 内容为:
ZmxvYXRpbmdjYXQK
四、告警配置(可选)
一、安装sendmail
yum install sendmail
smokeping 默认用Linux中的sendmail邮件服务器发送邮件告警。但是也可以通过管道符“|”直接调用外部脚本程序进行报警。
二、Alerts告警规则配置
自定义告警规则,hostdown、bigloss、lossdetect、someloss、rttdetect,在Targets里调用时候规则之间用逗号隔开。
"to" 选项,默认是要填入一个email地址的,但是只要在"="后面加上"|",后面再跟你自定义的脚本的路径,就可以调用自己的脚本进行alert了。脚本会读入5或者6个参数:alertname, target, losspattern, rtt, hostname,[raise]。在脚本添加参数alert即可。
*** Alerts ***
to = |/etc/smokeping/send_alert.sh #我这里采用外部程序自定义告警
from = #smokealert@company.xy

# 定义各种告警规则
+hostdown
type = loss
# in percent
pattern = ==0%,==0%,==0%, ==U
comment = 对端无响应

+bigloss
type = loss
# in percent
pattern = ==0%,==0%,==0%,==0%,>20%,>20%,>20%
comment = 连续3次采样-丢包率超过20%

+lossdetect
type = loss
# in percent
pattern = ==0%,==0%,==0%,==0%,>0%,>0%,>0%
comment = 连续3次采样-存在丢包

+someloss
type = loss
# in percent
pattern = >0%,*12*,>0%,*12*,>0%
comment = 间断性丢包

+rttdetect
type = rtt
# in milli seconds
pattern = <50,<50,<50,<50,<50,<100,>100,>100,>100
comment = 连续3次采样延迟增大-超过100ms
告警脚本内容:
#!/bin/bash
#将来自smokeping的位置变量分别储存
alertname=$1
target=$2
losspattern=$3
rtt=$4
hostname=$5
Date=$( date '+%Y-%m-%d %H:%M:%S' )
#定义收件人邮箱
to_email="644174493@qq.com"
#定义邮件内容文件
mail_content_file=/tmp/smokeping_mail_content
#定义邮件主题开头
smokename="Monitor"
#判断警报还是警报解除,以构造报警邮件主题
if [ "$losspattern" = "loss: 0%" ];then
		subject="Clear-${smokename}-Alert: $target host: ${hostname}"
	else
			subject="${smokename}Alert: ${target} - ${hostname}"
fi
#清空旧的邮件内容文件
>${mail_content_file}
#将获取到的参数输出到新的邮件内容文件中
echo -e "Name of Alert: $alertname" >> ${mail_content_file}
echo -e "Target:	$target" >> ${mail_content_file}
echo -e "Loss Pattern:	  $losspattern" >> ${mail_content_file}
echo -e "RTT Pattern:	$rtt" >> ${mail_content_file}
echo -e "Hostname:	$hostname" >> ${mail_content_file}
echo -e "Alert time: $( date '+%Y-%m-%d %H:%M:%S' )" >> ${mail_content_file}
echo -e "" >> ${mail_content_file}
#判断文件内容文件大小是否为非0,是则代表成功构造了内容
if [ -s ${smokeping_mail_content} ];then
	#提取邮件正文内容内容
		content=$(cat ${mail_content_file})
		#调用sendemail 发送邮件
			/usr/bin/sendemail -f  发件邮箱账号 -t "$to_email" -s "smtp.zoho.com.cn:587" -u "$subject" -o tls=yes   -xu "发件邮箱账号"        -xp "发件邮箱密码" -m "$content"
fi

exit 0
五、使用TCPPing监测(可选)
TCPPing不是内联探针,需要安装才能使用。实际上,官方的TCPPing仅仅是一个简短的shell脚本而已,实际工作的是tcptraceroute。如果想要使用tcpping监测则需要从Github下载tcpping放到/usr/bin目录下,并且系统需要安装tcptraceroute,然后在Probes里添加TCPPing,最后在Targets里调用tcpping。
安装traceroute
apt install tcptraceroute
下载tcpping到/usr/bin/目录下
cd /usr/bin/
wget http://www.vdberg.org/~richard/tcpping
chmod +x tcpping
Probes设置
cd /etc/smokeping/config.d/目录下修改Probes配置文件
*** Probes ***
+ FPing binary = /usr/bin/fping

+ TCPPing
binary = /usr/bin/tcpping  # 注意,tcpping是一个shell脚本并调用traceroute,系统上要把tcptraceroute装一下
forks = 5
step = 60
timeout = 15
pings = 10
port = 80
参数binary 指定了tcpping脚本的路径,forks 指定了最大并发数量,step 指定了步进值,此值优先于从Database区域的继承值,timeout 指定了单个探测的超时时间,pings 指定了一周期探测的次数,port 指定了 探测的目标端口。
Targets调用
*** Targets ***

probe = FPing

menu = Top
title = Network Latency Grapher
remark = Welcome to the SmokePing website of xxx Company.
         Here you will learn all about the latency of our network.

+ Local

menu = Local
title = Local Network
#parents = owner:/Test/James location:/

++ LocalMachine

menu = Local Machine
title = This host
host = localhost
#alerts = someloss

++ blog

menu = blog
title = blog
host = mefj.com.cn


+ tcpping
menu = TCP拨测
title = TCP拨测监控


++ baidu
probe = TCPPing
menu = 百度
title = 百度
host = 40.100.54.194
这里的fping和tcpping可以共存,系统默认调用的是fping。需要tcpping的则在Targets里probe = TCPPing调用。
TCPPing脚本如下:
#!/bin/sh
#
# tcpping: test response times using TCP SYN packets
#          URL: http://www.vdberg.org/~richard/tcpping.html
#
# uses tcptraceroute from http://michael.toren.net/code/tcptraceroute/
#
# (c) 2002-2005 Richard van den Berg <richard@vdberg.org> under the GPL
#               http://www.gnu.org/copyleft/gpl.html
#
# 2002/12/20 v1.0 initial version
# 2003/01/25 v1.1 added -c and -r options
#                 now accepting all other tcptraceroute options
# 2003/01/30 v1.2 removed double quotes around backquotes
# 2003/03/25 v1.3 added -x option, courtesy of Alvin Austin <alvin@crlogic.com>
# 2005/03/31 v1.4 added -C option, courtesy of Norman Rasmussen <norman@rasmussen.org>
# 2007/01/11 v1.5 catch bad destination addresses
# 2007/01/19 v1.6 catch non-root tcptraceroute
# 2008/02/10 v1.7 make -C work when reverse lookup fails, courtesy of Fabrice Le Dorze <Fabrice.LeDorze@apx.fr>


ver="v1.7"
format="%Y%m%d%H%M%S"
d="no"
c="no"
C="no"
ttl=255
seq=0
q=1
r=1
w=3
topts=""

usage () {
	name=`basename $0`
	echo "tcpping $ver Richard van den Berg <richard@vdberg.org>"
	echo
	echo "Usage: $name [-d] [-c] [-C] [-w sec] [-q num] [-x count] ipaddress [port]"
	echo
	echo "        -d   print timestamp before every result"
	echo "        -c   print a columned result line"
	echo "        -C   print in the same format as fping's -C option"
	echo "        -w   wait time in seconds (defaults to 3)"
	echo "        -r   repeat every n seconds (defaults to 1)"
	echo "        -x   repeat n times (defaults to unlimited)"
	echo
	echo "See also: man tcptraceroute"
	echo
}

_checksite() {
	ttr=`tcptraceroute -f ${ttl} -m ${ttl} -q ${q} -w ${w} $* 2>&1`
	if echo "${ttr}" | egrep -i "(bad destination|got roo)" >/dev/null 2>&1; then
		echo "${ttr}"
		exit
	fi
}

_testsite() {
	myseq="${1}"
	shift
	[ "${c}" = "yes" ] && nows=`date +${format}`
	[ "${d}" = "yes" ] && nowd=`date`
	ttr=`tcptraceroute -f ${ttl} -m ${ttl} -q ${q} -w ${w} $* 2>/dev/null`
	host=`echo "${ttr}" | awk '{print $2 " " $3}'`
	rtt=`echo "${ttr}" | sed 's/.*] //' | awk '{print $1}'`
	not=`echo "${rtt}" | tr -d ".0123456789"`
	[ "${d}" = "yes" ] && echo "$nowd"
	if [ "${c}" = "yes" ]; then
		if [ "x${rtt}" != "x" -a "x${not}" = "x" ]; then
			echo "$myseq $nows $rtt $host"
		else
			echo "$myseq $nows $max $host"
		fi
	elif [ "${C}" = "yes" ]; then
		if [ "$myseq" = "0" ]; then
			echo -n "$1 :"
		fi
		if [ "x${rtt}" != "x" -a "x${not}" = "x" ]; then
			echo -n " $rtt"
		else
			echo -n " -"
		fi
		if [ "$x" = "1" ]; then
			echo
		fi
	else
		echo "${ttr}" | sed -e "s/^.**.*$/seq $myseq: no response (timeout)/" -e "s/^$ttl /seq $myseq: tcp response from/"
	fi
#       echo "${ttr}"
}

while getopts dhq:w:cr:nNFSAEi:f:l:m:p:s:x:C opt ; do
	case "$opt" in
		d|c|C) eval $opt="yes" ;;
		q|w|r|x) eval $opt="$OPTARG" ;;
		n|N|F|S|A|E) topt="$topt -$opt" ;;
		i|l|p|s) topt="$topt -$opt $OPTARG" ;;
		f|m) ttl="$OPTARG" ;;
		?) usage; exit ;;
	esac
done

shift `expr $OPTIND - 1`

if [ "x$1" = "x" ]; then
	usage
	exit
fi

max=`echo "${w} * 1000" | bc`

if [ `date +%s` != "%s" ]; then
	format="%s"
fi

_checksite ${topt} $*

if [ "$x" = "" ]; then
	while [ 1 ] ; do
		_testsite ${seq} ${topt} $* &
		pid=$!
		if [ "${C}" = "yes" ]; then
			wait $pid
		fi
		seq=`expr $seq + 1`
		sleep ${r}
	done
else
	while [ "$x" -gt 0 ] ; do
		_testsite ${seq} ${topt} $* &
		pid=$!
		if [ "${C}" = "yes" ]; then
			wait $pid
		fi
		seq=`expr $seq + 1`
		x=`expr $x - 1`
		if [ "$x" -gt 0 ]; then
			sleep ${r}
		fi
	done
fi

exit
附加:(可选)
为smokeping添加访问用户和密码,利用htpasswd命令创建用户和修改密码,其实就是给阿帕奇web服务器添加个验证。访问页面会先验证htpasswd文件里的用户名和密码。
htpasswd是开源Http服务器apache httpd的一个命令工具,用于生成Http基本认证的密码文件。
语法
htpasswd(选项)(参数)
选项
-c:创建一个加密文件;
-n:不更新加密文件,只将加密后的用户名密码显示在屏幕上;-m:默认采用MD5算法对密码进行加密;-d:采用CRYPT算法对密码进行加密;-p:不对密码进行进行加密,即明文密码;-s:采用SHA算法对密码进行加密;-b:在命令行中一并输入用户名和密码而不是根据提示输入密码;-D:删除指定的用户。
参数
用户:要创建或者更新密码的用户名;
密码:用户的新密码。
实例
利用htpasswd命令添加用户(输两遍设置的用户密码,successfuly)
htpasswd -c htpasswd 用户名
参考:
找到smokeping的阿帕奇配置文件,一般默认安装都是/etc/apache2/conf-available这个路径。
ScriptAlias /smokeping/smokeping.cgi /usr/lib/cgi-bin/smokeping.cgi
Alias /smokeping /usr/share/smokeping/www

<Directory "/usr/share/smokeping/www">
    AllowOverride None
    Options All
    AddHandler cgi-script .fcgi .cgi
    Order allow,deny
    Allow from all
    AuthName "smokeping" #网页提示
    AuthType Basic
    AuthUserFile /etc/smokeping/htpasswd #用户和密码文件路径
    Require valid-user
</Directory>
常见问题:(解决)
浏览界面显示图中文乱码,如下图
安装中文字体
第一步:
sudo apt-get install fonts-wqy-zenhei #文泉驿-正黑
第二步:
编辑/etc/smokeping/config.d的配置文件Presentation,将charset改成UTF-8
*** Presentation ***

template = /etc/smokeping/basepage.html
charset = UTF-8
htmltitle = yes
graphborders = no
重启smokeping发现中文乱码没了。正常情况最新版执行第一步就行了。
- 微信公众号
- 扫一扫关注微信公众号
-

- 运维交流群
- 扫一扫二维码加入群聊
-